Translate

Showing posts with label poppies. Show all posts

Sunday, April 28, 2013

Saturday Sketch #4 April 2013


Today I've tried something a bit different mixing the Remember Me Collection and some paper from the Base Coat Collection.

I was trying to find that 'bedrock' feel from the flintstones era LOL! It seems there is a lack of animal prints in the Kaisercraft papers, so that might be a good range for the future!!? Anyway, I was quite happy with this awesome paper from the base coat collection and I feel it has done the job perfectly.

This was always going to be a difficult photo to scrap, so in the end I just decided to emphasise the 'in the garden' theme .... thats always my fallback theme when I can't capture a theme from the photo.

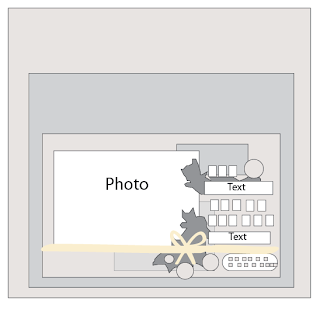
here is the sketch that this layout was based on...


Thanks for stopping by for a look.
Smiles from Kelly-ann.


Wednesday, April 10, 2013

Remember Me Class


A Class for the locals using the  Remember Me Collection...

Just a quick post today to let anyone local know that in May I'll be running a 
TRIPPLE LAYOUT class.... it will be held on 
Saturday 18th of May, 10am - 3pm

at the North Coast Community Church 67 Richmond Street Casino ( next to Casino Swimming Pool).
Cost will be $40 per person, and will INCLUDE lunch and drinks!!
I have 20 places on offer... and bookings are essential.
The 3 layouts we will be creating are all shown here in this post...


And if we have any time and energy left at all at the end of these pages I thought we might make a few of these little gift boxes well...


Monday, April 8, 2013

Remember Me Layout with a difference


Today I'm sharing a special layout made using the Remember Me Collection.

This page is a bit different for me as I have barely used any product at all on it, instead I have chosen to get a bit arty on this page... a style I believe I will do a lot more of in the future.

Don't get me wrong here... I love my products... I'll always love to add as many as possible to my pages! LOL. But there is just something so special and satisfying about adding your own unique touches to a layout as well.

Anyway, to create this effect I simply matted and stuck down my photo on the page, then lifted the edges to Ink a kind of hue that emanates from behind the photo ( I also stuck down the lettering stickers for Lilly's name before beging the inking process).

After that I laid a circle over the top of the photo, making sure to place it slightly off center and over the edges of a couple of corners of the photo. Using a pencil I traced a faint line around the circle onto the paper to act as a guide. I then used a permeant fine tip marker to draw on the vines, leaves, buds and flowers... always using that circle mark as my guide and continuing on over the photo as the circle dictated.

After this I used some quite opaque 'Pistachio' paint to block in the flowers, buds and leaves. Using my distress inks and a paint brush I then added the red to the center of the flowers and the buds, and green hues to the leaves.

It's a simple technique that pivots on the opaque paint creating an almost translucent effect with your own drawings... and it's quite simple as well... i was not careful with my sketching here at all, it's ment to look a bit scribbly... everyone can scribble so I think everyone can do this technique!! LOL

The other key element here is the permeant marker ... because this kind of marker will draw consistently over any surface ( in this case photo paper and normal papers) it means you can seamlessly transition across your page with your drawings, giving the whole thing a more cohesive look and feel. That kind of thing just helps to tie it all together better.

Thanks for stopping by again today ... I hope you enjoyed this one as much as I did.
Smiles from Kel.



Saturday, April 6, 2013

Remember Me Cards


Hello.... I'm back today to share some cards made with the Remember Me Collection. All of my cards today have been made using the paper pad and collectables elements with a few rhinestones and sparklets thrown in for that extra bit of bling!!

AgainI just want to say.... I'm LOVIN all this red bliss!!
This truly is a collection made just for me. LOL

I used a heap of ink with these in order to create hues and floating borders, and on the card above I've used the Kaisercraft Doily mask to create the background pattern.

They are all very simple, easy to put together cards ( just the way I like my card making) but the striking colours really make them pop in real life.

The bold contrasting colours really are the most outstanding quality of this fabulous collection.

Thanks for stopping by for a visit.

Cheers from Kelly-ann.


Thursday, April 4, 2013

Remember Me Layout


 Today I'm sharing the first layout I made with the Remember Me Collection.
I LOVE and ADORE the colour red, so this collection has just captured me like no other!!

The gold foil highlight on this round speciality sheet of paper are so beautiful I couldn't resist grabbing it to work with first of all.

The main techniques that I've used on this page is resistance inking. For the title LOVE I took the 4 letter stickers and stuck them to some material, then lifted them on ans off a few times to ensure they were slightly less sticky, then I stuck them on the page where I wanted the title to be. Next I gently rubbed over the area with red ink on a large flat ink blending tool.
After that you just need to carefully lift off the sticker letters and what you have left behind will be your title! I really like the effect of this technique.

Thanks for stopping by for a look.
Smiles from Kelly-ann